Homemade Ice Cream with Fruit: Worth a Try!

Get ready to substitute your traditional ice cream flavors for these homemade ice cream options that are much healthier and full of vitamins. We can make them ourselves to eliminate the fat and sugar found in the ice cream that we buy in the supermarket.
Whether summer is here or not, we may still enjoy eating cold and refreshing food. In this article, we’ll give you several fruit-flavored ice cream recipes. This is a healthy and refreshing way to eat. And in addition, you’ll see how all of these recipes are prepared in just a few short minutes and can be kept in the freezer for days.
Kiwi homemade ice cream
The purpose of homemade ice cream with fruit is that it contains vitamin C. These recipes are made with just two kiwis and include oranges, two foods with high levels of vitamin C that give you extra energy in a very healthy way.

Ingredients for eight popsicles
- 4 oranges
- 3 kiwis
Directions:
- Begin by making juice out of the 4 oranges. You can do this manually or use an electric juicer.
- Then peel and slice a kiwi. Add it to the orange juice and crush it.
- Peel the remaining kiwis and cut them into thin slices. These will be to decorate the popsicles.
- Put two slices of kiwi in each popsicle mold and then fill it with the juice.
- Add the stick to the mold and place it in the freezer for 4 hours.
- Later, when you want to eat them, all you have to do is wet them with water in order to remove them from the mold.
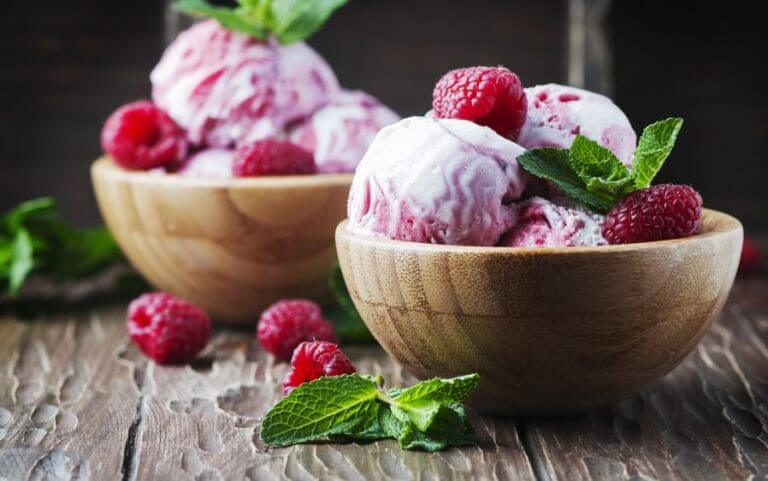
Raspberry and yogurt mix
This ice cream in a tub is perfect to serve at any occasion, be it formal or informal. To add more flavor, you can include sliced fruit or drops of dark chocolate. Take note and learn to make this delicious raspberry and yogurt ice cream.
Ingredients:
- 6.5 ounces of condensed milk
- 2 containers of yogurt
- 1/4 cup of whipped cream for the top
- 1 cup of raspberries
Directions:
- Crush half of the raspberries and cut the other half into chunks. Doing this, you’ll have different textures, but the same flavor.
- In a bowl combine the milk with the yogurt. Then add the chopped and crushed fruit. Allow this to sit for several minutes.
- In another bowl whip the cream and mix it with the contents of the other bowl.
- Next, stir together all of the ingredients and pour them into the tub that you’ll use to freeze the mixture.
- Stir again and put the mixture in the freezer.
- Later, take out of the freezer every 3 hours and stir.
- Finally, keep in the freezer 4 more hours without stirring. It’s now ready!
Apricot ice cream
Lastly, we give you a recipe for ice cream with fruit that’s the most original. This is an apricot ice cream to eat between cookies. Apricots are not often used to make ice cream, so you’ll surprise your family or guests. Of course, they’ll want seconds. Be sure to make this ice cream that’s so healthy.

Ingredients:
- 14 ounces of apricots
- Half a lemon
- 1 tablespoon of honey
- 1/2 cup of sugar
- 1/3 cup of whipped cream
Directions:
- The first step is to wash the apricots.
- Peeling them is optional, according to your preference. Unlike other fruit, apricots have very thin skin so that it’s fine not to peel them.
- Slice the apricots, eliminating the seed.
- Mix the apricots with the juice of a medium-sized lemon, the honey, and the sugar. Let this mixture stand for a half-hour.
- Next, whip the cream in another bowl.
- Mix the contents of the two bowls and stir.
- Put the mixture in a rectangular container to give the form of a block of ice cream.
- Put the mixture in the refrigerator for 3 hours.
- After this, place it in the freezer.
- The ice cream will be ready to serve after 6 hours in the freezer. Next, all you have to do is to cut the block into one and one-half-inch slices. It’s ready to serve!
Get ready to substitute your traditional ice cream flavors for these homemade ice cream options that are much healthier and full of vitamins. We can make them ourselves to eliminate the fat and sugar found in the ice cream that we buy in the supermarket.
Whether summer is here or not, we may still enjoy eating cold and refreshing food. In this article, we’ll give you several fruit-flavored ice cream recipes. This is a healthy and refreshing way to eat. And in addition, you’ll see how all of these recipes are prepared in just a few short minutes and can be kept in the freezer for days.
Kiwi homemade ice cream
The purpose of homemade ice cream with fruit is that it contains vitamin C. These recipes are made with just two kiwis and include oranges, two foods with high levels of vitamin C that give you extra energy in a very healthy way.
Ingredients for eight popsicles
- 4 oranges
- 3 kiwis
Directions:
- Begin by making juice out of the 4 oranges. You can do this manually or use an electric juicer.
- Then peel and slice a kiwi. Add it to the orange juice and crush it.
- Peel the remaining kiwis and cut them into thin slices. These will be to decorate the popsicles.
- Put two slices of kiwi in each popsicle mold and then fill it with the juice.
- Add the stick to the mold and place it in the freezer for 4 hours.
- Later, when you want to eat them, all you have to do is wet them with water in order to remove them from the mold.
Raspberry and yogurt mix
This ice cream in a tub is perfect to serve at any occasion, be it formal or informal. To add more flavor, you can include sliced fruit or drops of dark chocolate. Take note and learn to make this delicious raspberry and yogurt ice cream.
Ingredients:
- 6.5 ounces of condensed milk
- 2 containers of yogurt
- 1/4 cup of whipped cream for the top
- 1 cup of raspberries
Directions:
- Crush half of the raspberries and cut the other half into chunks. Doing this, you’ll have different textures, but the same flavor.
- In a bowl combine the milk with the yogurt. Then add the chopped and crushed fruit. Allow this to sit for several minutes.
- In another bowl whip the cream and mix it with the contents of the other bowl.
- Next, stir together all of the ingredients and pour them into the tub that you’ll use to freeze the mixture.
- Stir again and put the mixture in the freezer.
- Later, take out of the freezer every 3 hours and stir.
- Finally, keep in the freezer 4 more hours without stirring. It’s now ready!
Apricot ice cream
Lastly, we give you a recipe for ice cream with fruit that’s the most original. This is an apricot ice cream to eat between cookies. Apricots are not often used to make ice cream, so you’ll surprise your family or guests. Of course, they’ll want seconds. Be sure to make this ice cream that’s so healthy.
Ingredients:
- 14 ounces of apricots
- Half a lemon
- 1 tablespoon of honey
- 1/2 cup of sugar
- 1/3 cup of whipped cream
Directions:
- The first step is to wash the apricots.
- Peeling them is optional, according to your preference. Unlike other fruit, apricots have very thin skin so that it’s fine not to peel them.
- Slice the apricots, eliminating the seed.
- Mix the apricots with the juice of a medium-sized lemon, the honey, and the sugar. Let this mixture stand for a half-hour.
- Next, whip the cream in another bowl.
- Mix the contents of the two bowls and stir.
- Put the mixture in a rectangular container to give the form of a block of ice cream.
- Put the mixture in the refrigerator for 3 hours.
- After this, place it in the freezer.
- The ice cream will be ready to serve after 6 hours in the freezer. Next, all you have to do is to cut the block into one and one-half-inch slices. It’s ready to serve!
This text is provided for informational purposes only and does not replace consultation with a professional. If in doubt, consult your specialist.