How to Make Healthy, Homemade Pizza in Under 50 Minutes

Now, who doesn’t like pizza? This classic Italian recipe delights taste buds all around the world. In the last decade, pizza has become more and more popular. You can even buy pre-cooked pizzas at the supermarket or in fast-food restaurants.
However, this has caused changes to the recipe, and from a nutritional perspective, it has become worse.
Since homemade is usually healthier, we recommend that you make your own homemade pizza. And you can do this in under 50 minutes!
In a little over half an hour, you can be eating a delicious, Italian style pizza! This is a healthy and nutritious recipe, that’s perfect for any type of diet. So, put on your apron and take notes. As you’ll see, making your own homemade pizza in under 50 minutes, is much easier than you think.
Step 1: making the dough
The first step will be making the dough. Making it the Italian way is very easy and only requires a few ingredients.
For a pizza with four servings, you will need:
- 8 ounces of flour
- 0.35 ounces of salt
- 0.35 ounces of yeast or baking powder
- 1/3 of a pint of warm water
Depending on how thick you like your pizza, you’ll need to add more or less yeast.
Begin by putting the flour in a bowl and mixing it with the salt.
Then add the water and the yeast and knead it, until you form a compact ball.
Afterwards, put it to one side and let it rise for about 10 minutes. This is the most important step of all.
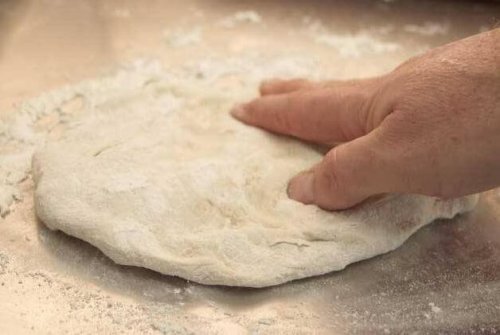
In order to avoid the dough from drying, cover it with a piece of cloth or plastic wrap. Once 10 minutes has passed, lay it over some parchment paper, and roll it out until you reach the size of your tray.
It’s very important that the rolled-out dough has the same thickness all over, so that it cooks evenly.
When the dough is rolled-out and even, cover it with a cloth and let it sit for about 20 minutes.
Step 2: the topping
If you haven’t already made the edges or the “walls” of the pizza yet, this is the time to do it. All you need to do is pinch around the edges of the rolled-out dough, so that the edges become thicker. Besides making your pizza more aesthetically pleasing, it’ll make it easier to eat, as all of the ingredients will be held in place.
Once you’ve made the “walls”, spread a light layer of tomato paste all over the surface. Depending on your taste, you may also add some oregano on top. Although usually oregano is added at the end, the tomato paste will intensify its flavor.
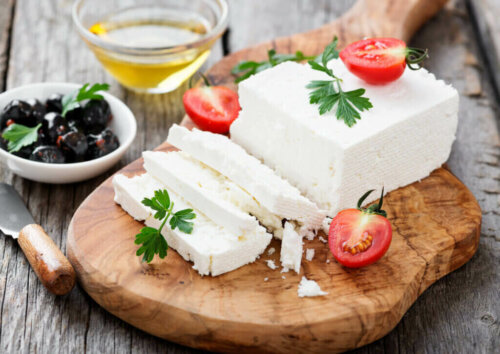
Now, it’s time for the cheese. You have several options here. The preferred one is to put the grated cheese on top of the sauce. For cheese lovers, the other option is to cover the whole surface, with bigger slices of cheese, and save the grated cheese for the end, when all of the ingredients are on the pizza.
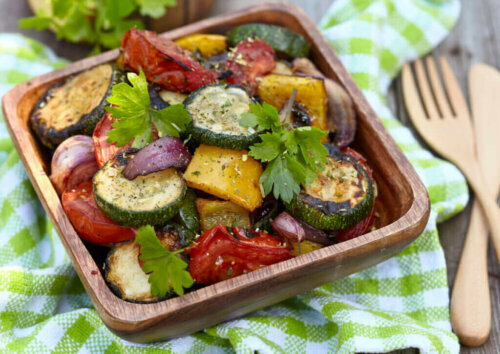
Lastly, add the toppings to your pizza. There are as many possibilities for toppings, as there are people in the world! We recommend that you let your creativity guide you with this. However, here are some ideas to help you choose:
Step 3: baking the pizza
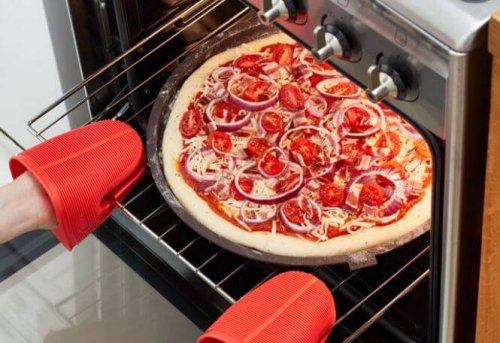
Now that the pizza is ready, all that’s left to do is to cook it. Pre-heat the oven to 420 degrees. Place the pizza in the oven and cook it, using only the lower heating element. This is because the middle part of the pizza takes longer to cook.
After five minutes, turn on the upper heating element and keep both elements on for a couple of minutes. Lastly, take the pizza out of the oven, and as easy as that, it’s ready to eat!
As you can see, making your own pizza has so many benefits: you know what you’re eating, it includes healthy ingredients, it’s easy to make, and of course, you get the satisfaction from making it yourself!
Now, who doesn’t like pizza? This classic Italian recipe delights taste buds all around the world. In the last decade, pizza has become more and more popular. You can even buy pre-cooked pizzas at the supermarket or in fast-food restaurants.
However, this has caused changes to the recipe, and from a nutritional perspective, it has become worse.
Since homemade is usually healthier, we recommend that you make your own homemade pizza. And you can do this in under 50 minutes!
In a little over half an hour, you can be eating a delicious, Italian style pizza! This is a healthy and nutritious recipe, that’s perfect for any type of diet. So, put on your apron and take notes. As you’ll see, making your own homemade pizza in under 50 minutes, is much easier than you think.
Step 1: making the dough
The first step will be making the dough. Making it the Italian way is very easy and only requires a few ingredients.
For a pizza with four servings, you will need:
- 8 ounces of flour
- 0.35 ounces of salt
- 0.35 ounces of yeast or baking powder
- 1/3 of a pint of warm water
Depending on how thick you like your pizza, you’ll need to add more or less yeast.
Begin by putting the flour in a bowl and mixing it with the salt.
Then add the water and the yeast and knead it, until you form a compact ball.
Afterwards, put it to one side and let it rise for about 10 minutes. This is the most important step of all.
In order to avoid the dough from drying, cover it with a piece of cloth or plastic wrap. Once 10 minutes has passed, lay it over some parchment paper, and roll it out until you reach the size of your tray.
It’s very important that the rolled-out dough has the same thickness all over, so that it cooks evenly.
When the dough is rolled-out and even, cover it with a cloth and let it sit for about 20 minutes.
Step 2: the topping
If you haven’t already made the edges or the “walls” of the pizza yet, this is the time to do it. All you need to do is pinch around the edges of the rolled-out dough, so that the edges become thicker. Besides making your pizza more aesthetically pleasing, it’ll make it easier to eat, as all of the ingredients will be held in place.
Once you’ve made the “walls”, spread a light layer of tomato paste all over the surface. Depending on your taste, you may also add some oregano on top. Although usually oregano is added at the end, the tomato paste will intensify its flavor.
Now, it’s time for the cheese. You have several options here. The preferred one is to put the grated cheese on top of the sauce. For cheese lovers, the other option is to cover the whole surface, with bigger slices of cheese, and save the grated cheese for the end, when all of the ingredients are on the pizza.
Lastly, add the toppings to your pizza. There are as many possibilities for toppings, as there are people in the world! We recommend that you let your creativity guide you with this. However, here are some ideas to help you choose:
Step 3: baking the pizza
Now that the pizza is ready, all that’s left to do is to cook it. Pre-heat the oven to 420 degrees. Place the pizza in the oven and cook it, using only the lower heating element. This is because the middle part of the pizza takes longer to cook.
After five minutes, turn on the upper heating element and keep both elements on for a couple of minutes. Lastly, take the pizza out of the oven, and as easy as that, it’s ready to eat!
As you can see, making your own pizza has so many benefits: you know what you’re eating, it includes healthy ingredients, it’s easy to make, and of course, you get the satisfaction from making it yourself!
This text is provided for informational purposes only and does not replace consultation with a professional. If in doubt, consult your specialist.